How to Make a Traditional Turkish Bow: Step-by-Step Guide
The art of making a traditional Turkish bow is much more than just woodworking and stringing. It is a blend of history, craftsmanship, and understanding the subtle forces that create powerful, accurate, and beautiful archery equipment. Turkish bows, also known as Ottoman composite bows, have a unique reputation in the world of archery. Their efficiency, compact size, and historical significance make them highly sought after by both collectors and archery enthusiasts. If you are fascinated by traditional craftsmanship or want to experience archery in its purest form, learning how to make a Turkish bow is a rewarding journey.
This guide will walk you through the process step by step, from selecting materials to the final touches. You will discover the secrets behind their powerful design, the tools you need, and the skills required to craft a bow that not only looks authentic but also performs well.
With patience and attention to detail, you can create a piece of history with your own hands.
Understanding The Traditional Turkish Bow
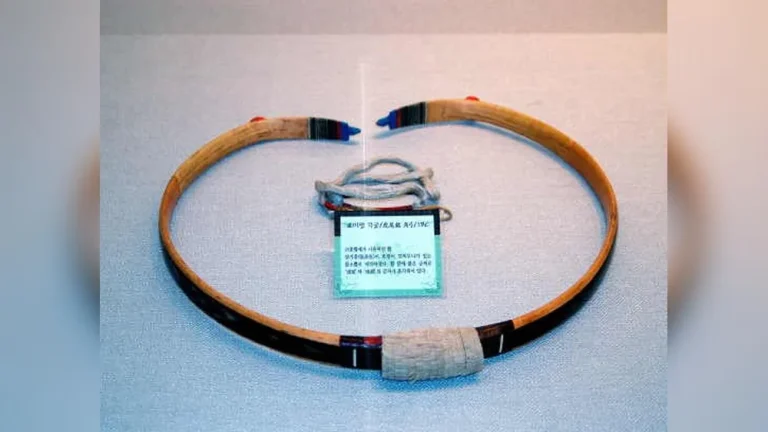
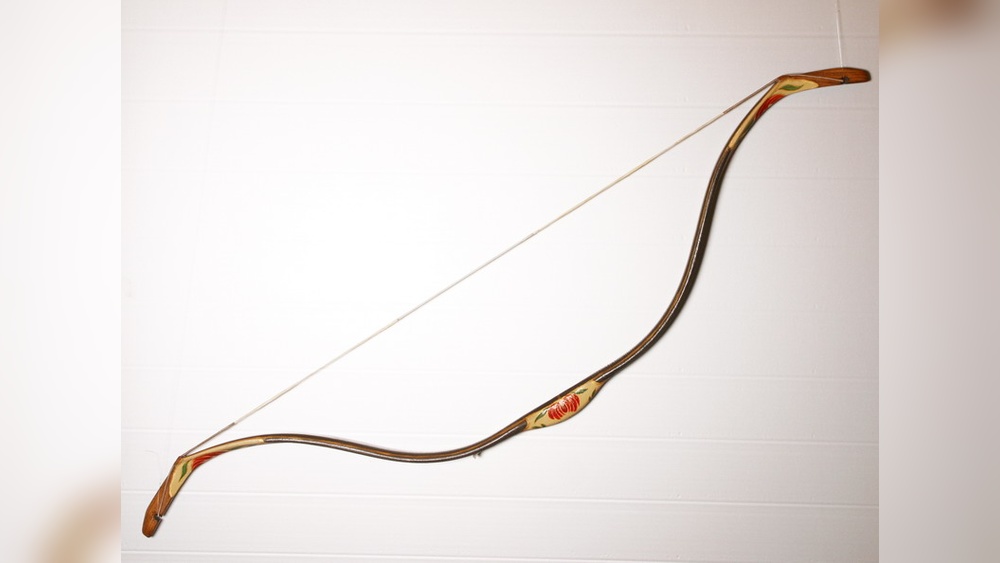
The Turkish bow has a distinct shape, with short limbs and exaggerated curves. Unlike simple wooden bows, it uses a composite structure, meaning it is made from several materials glued together. This composite build gives the bow its impressive power and flexibility, despite its small size.
The main materials used are:
- Wood: Typically maple, mulberry, or hornbeam is used for the core. The wood forms the skeleton and provides stability.
- Horn: Usually water buffalo or cow horn is applied to the belly (the side facing the archer). This material compresses during draw and stores energy.
- Sinew: Animal tendons, often from deer or cattle, are glued to the back (the side facing the target). Sinew stretches and increases the bow’s power and flexibility.
- Glue: Traditional bows use natural adhesives like hide glue or fish bladder glue.
What makes Turkish bows unique is their compact design. Most measure between 41 and 45 inches when strung, yet can shoot arrows at remarkable speeds. Their recurved limbs allow for a high draw weight and long draw length relative to their size.
Pro Tip: Many beginners think a bigger bow is always better for power. In reality, the composite structure and recurved limbs of the Turkish bow deliver high performance in a small package.
Key Features And History
The Turkish bow was perfected during the Ottoman Empire, especially between the 15th and 17th centuries. These bows were used by mounted archers, making their lightweight and compact shape ideal for horseback use. The famous “flight archery” competitions in Turkey pushed bowyers (bow makers) to create the most efficient and far-shooting designs.
Some remarkable features include:
- Recurved and reflexed limbs: The limbs curve away from the archer at the tips and even curve forward when unstrung.
- Siyahs: Reinforced tips made from wood or horn, which help transfer energy to the arrow.
- Distinctive decoration: Many bows were painted or covered in leather, with artistic patterns.
Today, Turkish bows are celebrated for their performance and historical value. Crafting one by hand connects you to centuries of tradition.

Credit: classic-bow.com
Tools And Materials Needed
Before starting, gather the right materials and tools. Using traditional materials gives the most authentic experience, but some modern alternatives can make the process easier for beginners.
Essential Materials
- Wood for the core: Maple, mulberry, or hornbeam are preferred. Choose straight, knot-free pieces about 1 inch wide, 0.5 inches thick, and 40-45 inches long.
- Horn strips: Water buffalo or cow horn, cut into strips slightly wider than the wood core.
- Sinew: Cleaned and separated animal tendon, enough to cover the bow’s back with two or three layers.
- Hide glue: Made from animal parts, available at craft or woodworking stores.
- Thread or cord: To bind the bow during the drying process.
- Finishing materials: Leather, paint, or varnish for the final look.
Tools Required
- Saw: For cutting wood and horn to size.
- Rasp and files: For shaping the core and limbs.
- Plane or spokeshave: To smooth wood surfaces.
- Clamps and binding cord: For holding materials during gluing.
- Measuring tools: Ruler, caliper, and marking pencil.
- Heating source: A heat gun or open flame for bending limbs.
- Scraper or sharp knife: For trimming horn and sinew.
- Bow form or jig: To shape the bow while gluing.
- Protective gloves: Horn and glue work can be messy.
Example: When I tested different woods, maple gave a balance of flexibility and strength. Beginners may find it easier to work with than harder woods like hornbeam.
Preparing The Bow Core
The core is the foundation of your Turkish bow. It must be strong, flexible, and free from defects.
- Select the wood: Choose a straight-grained, knot-free piece. Avoid any cracks or unevenness.
- Mark the shape: Draw the outline of the bow on the wood. Turkish bows have a distinct “C” shape when unstrung. The handle section is about 4-5 inches long in the middle.
- Cut and shape: Use a saw to cut out the rough shape. Then use rasps and files to shape the limbs, tapering them from the handle outwards.
- Taper the thickness: The limbs should be thickest near the handle and thinner toward the tips. This helps with energy transfer.
Pro Tip: Many first-time bowyers make the limbs too thick. This makes the bow hard to draw and inefficient. Take your time tapering the limbs evenly.
Dimensions And Measurements
Here’s a comparison of typical Turkish bow sizes:
| Bow Type | Length (Strung) | Draw Weight Range | Draw Length |
|---|---|---|---|
| Ottoman Turkish | 41-45 in | 40, 70 lbs | 28-32 in |
| English Longbow | 70-75 in | 50, 110 lbs | 28-32 in |
| Mongolian Bow | 48-54 in | 40, 80 lbs | 28-32 in |
Notice how the Turkish bow is much shorter, but still powerful.

Credit: www.youtube.com
Attaching The Horn To The Belly
The horn layer is what gives the Turkish bow its snap and power. It is glued to the belly, the side facing you when shooting.
- Prepare the horn: Cut horn strips to match the length and width of the belly. Clean and roughen both the horn and the wood to help the glue stick.
- Heat the horn: Warm the horn gently to make it more flexible. Be careful not to overheat or burn it.
- Glue the horn: Apply a thin layer of hide glue to both the horn and the wood belly.
- Clamp or bind: Press the horn firmly onto the wood core. Use clamps or wrap tightly with cord to ensure a good bond. Let it dry for at least 48 hours.
Pro Tip: Don’t rush the drying process. Hide glue needs to fully cure for maximum strength.
Applying Sinew To The Back
The sinew layer is glued to the back of the bow. This step is critical for giving the bow its flexibility and preventing it from breaking under tension.
- Prepare the sinew: Separate the sinew into thin strands. Soak them in warm water until soft.
- Mix glue and sinew: Coat each strand with hide glue.
- Lay the sinew: Apply the strands to the back of the bow, overlapping slightly. Cover the whole back with one layer.
- Add more layers: After the first layer dries (about 2, 3 days), repeat for a second or even third layer for extra strength.
- Wrap and dry: Bind the bow with cord to hold the sinew flat. Dry in a warm, dry place for at least two weeks.
Example: Some bowyers use a mix of deer and cattle sinew for different properties. Deer sinew is finer, while cattle sinew is tougher.
Shaping And Tiller
After the sinew is fully dry, the bow needs to be shaped and tillered. Tiller is the process of adjusting the limbs so they bend evenly.
- Remove bindings: Carefully take off all cords.
- Check for warps: Sight down the limbs to spot any bends or twists. Use gentle heat to correct if necessary.
- Shape the limbs: Use a scraper or knife to refine the shape and thickness.
- Tiller the bow: String the bow with a weak string. Draw it a few inches at a time, watching how the limbs bend. Remove wood or horn from stiff areas until both limbs bend smoothly and evenly.
- Check draw weight: Use a bow scale to measure the draw weight. Aim for your target weight (most Turkish bows range from 40, 70 lbs).
Pro Tip: Beginners often overlook small differences in limb bend. Even a slight unevenness can affect shooting accuracy and bow life.
Adding Siyahs (tip Reinforcements)
Siyahs are the reinforced tips at the ends of the limbs. They help transfer energy efficiently to the arrow and protect the delicate limb ends.
- Carve siyahs: Use hard, dense wood or horn. Shape them to fit the limb tips.
- Attach siyahs: Glue and bind them securely to the tips using hide glue.
- Shape nocks: Cut small grooves in the siyahs for the bowstring.
Turkish siyahs are often slightly curved and may be decorated for aesthetics.

Credit: classic-bow.com
Final Shaping And Finishing
This stage brings out the bow’s beauty and protects it from moisture and damage.
- Smooth all surfaces: Sand or scrape the bow until smooth.
- Decorate (optional): Paint, inlay, or wrap the handle with leather. Traditional bows often feature floral or geometric patterns.
- Seal the bow: Apply a natural varnish or oil to protect the wood, horn, and sinew.
- String the bow: Make or buy a suitable string. Silk or modern synthetic strings can be used for safety and durability.
Here’s a comparison of finishing materials:
| Finishing Material | Traditional Use | Modern Alternative | Water Resistance |
|---|---|---|---|
| Natural Varnish | Yes | No | Medium |
| Shellac | No | Yes | Good |
| Oil (Linseed) | Yes | Yes | Low |
| Polyurethane | No | Yes | Excellent |
Stringing And Testing The Bow
Once the bow is finished, it’s time for careful testing and tuning.
- Brace the bow: Use a bow stringer to string the bow safely. Never step through or twist the limbs.
- Test draw: Pull the string slowly to half draw, then full draw. Listen for any creaks or cracks.
- Shoot a few arrows: Start with low-poundage arrows and check for smoothness, power, and accuracy.
- Fine-tune: If the bow pulls unevenly or vibrates, adjust the tiller or re-shape the limbs as needed.
Pro Tip: Don’t draw the bow to full length immediately. Gradually increase the draw to let the bow adjust to tension.
Troubleshooting Common Problems
Even experienced bowyers face challenges. Here are some typical issues and solutions:
- Cracks in the horn or core: Caused by uneven drying or poor glue. Repair with glue and clamps if small; replace if large.
- Uneven limb bend: Tiller again by removing material from stiff spots.
- String slips from siyahs: Deepen the nock or add a small groove to hold the string.
- Handle feels weak: Reinforce with a leather wrap or add extra layers of wood/horn.
Example: When I made my first bow, I rushed the sinew drying. The back cracked during testing. Now, I always let the sinew cure for at least three weeks.
Safety And Maintenance
Traditional Turkish bows are strong but need care.
- Avoid moisture: Store the bow in a dry place. Humidity can weaken glue and sinew.
- Unstring when not in use: Keeps the limbs from losing their reflex shape.
- Inspect regularly: Check for cracks or loose parts before each use.
- Use proper arrows: Light, matched arrows prevent damage to the bow.
Pro Tip: Never shoot a composite bow if you hear cracking or see signs of delamination. Repair before using again.
Preserving Tradition And Modern Adjustments
While traditional materials give the most authentic experience, some modern bowyers use fiberglass, epoxy, or synthetic sinew for durability and convenience. These bows may look and perform similarly but lose some of the historical feel.
If you want a true connection to Turkish archery history, stick to natural materials and methods. However, if you are new or want a bow that requires less maintenance, starting with modern substitutes is a practical choice.
For those interested in deeper research, the Wikipedia entry on Turkish bows offers extensive information on history, construction, and use.
Frequently Asked Questions
What Is The Typical Draw Weight For A Traditional Turkish Bow?
Most traditional Turkish bows have a draw weight between 40 and 70 pounds. For beginners, 40, 50 pounds is easier to manage, while experienced archers may prefer higher weights for speed and range.
How Long Does It Take To Make A Turkish Bow By Hand?
From start to finish, crafting a traditional Turkish bow can take three to six weeks. Most of this time is waiting for glue and sinew to dry and cure. Rushing any step can result in a