How to Make a Self Bow from a Board: Step-by-Step Guide
Making your own self bow from a board is a rewarding journey that connects you with ancient traditions and practical woodworking skills. Unlike complex laminated bows, a self bow is made from one piece of wood, often a simple hardware store board. This project doesn’t require expensive tools or rare wood. With patience and attention, you can craft a strong, accurate bow suitable for target shooting or even hunting. In this guide, you’ll learn how to choose the right wood, shape the bow, tiller it for balance, add the string, and finish for durability and performance. Along the way, you’ll discover tips only experienced bowyers know, like how moisture and grain direction affect the final result. Let’s get started on building a self bow you’ll be proud to shoot.
Understanding The Self Bow
A self bow is a traditional bow made from a single piece of wood. Unlike fiberglass or laminated bows, it relies on careful shaping and the natural properties of the wood. Cultures around the world, from Native Americans to European longbowmen, have relied on self bows for centuries.
The main benefit is simplicity, no glues or composites are needed. But this also means you must pay close attention to the wood’s grain and how you remove material. The skill is less about special tools and more about understanding wood and how to work with it.
Key characteristics of a self bow:
- Made from one solid piece of wood
- Requires careful tillering (balancing the limbs)
- Follows the natural grain as much as possible
- Typically 66, 72 inches long, but can vary
Choosing The Right Wood Board
Selecting a suitable board is the most important decision in bow making. The wrong board can waste hours of effort or even snap dangerously under tension.
What Makes A Good Bow Board?
Look for these features:
- Straight grain: The wood grain should run the full length of the board with minimal run-out or waves.
- Minimal knots: Small knots can sometimes work, but fewer is better.
- Clear wood: Avoid boards with cracks, splits, or insect damage.
- Proper thickness: A board about 1.5, 2 inches wide, 0.75, 1 inch thick, and 72 inches long is ideal.
Wood Species Comparison
Some woods are naturally better for bows due to their strength and flexibility.
| Wood Species | Pros | Cons |
|---|---|---|
| Hickory | Very tough, good for beginners, resists breaking | Heavier, sometimes slower than others |
| Osage Orange | Excellent performance, high strength | Hard to find, expensive |
| Red Oak | Easy to find at hardware stores, affordable | Can be brittle if grain is poor |
| Maple | Strong, smooth to work | Not as tough as hickory or osage |
Pro Tip: For your first bow, red oak is the easiest to source and has a good balance of strength and cost.
How To Select At The Store
Bring a small bottle of water. Rub it along the board to highlight the grain. Check that grain lines run parallel to the edges. Avoid boards with run-outs, where the grain curves off the side, as these can create weak spots.

Credit: www.youtube.com
Tools And Materials You’ll Need
You don’t need a fancy workshop. Here’s a list of basic tools for making a self bow from a board:
- Rasp or coarse file: For shaping the bow.
- Drawknife or spokeshave: Helps remove wood quickly and shape the limbs.
- Hand saw or coping saw: For roughing out the board.
- Sandpaper (60, 120, 220 grit): For smoothing.
- Clamps: To hold the board steady while working.
- Measuring tape and marker: For layout.
- Tillering stick or rope and pulley: For checking limb balance.
- Bow string material: Nylon cord, Dacron, or similar.
- Finish: Tung oil, boiled linseed oil, or polyurethane.
Optional but helpful:
- Cabinet scraper for fine adjustments
- Heat gun for correcting twist
Example: When I made my first self bow, I used only a rasp, a $10 hand saw, and sandpaper. Fancy tools help, but patience matters more.
Designing Your Bow Shape
Before you cut, sketch your bow on the board. The most common shape is the American longbow or a simple flatbow.
Basic Design Dimensions
- Length: 68, 72 inches for most adults
- Width at handle: 1.5 inches
- Width at tips: 0.5 inches
- Thickness: 0.75, 1 inch at the grip, tapering toward the tips
Mark the center of the board. Measure equal distances for the top and bottom limbs. Mark out the handle section (about 4 inches) in the center. Taper the limbs smoothly from handle to tip.
Symmetry Matters
Both limbs should be as similar as possible in length and width. Uneven limbs lead to poor shooting and possible breakage.
Pro Tip: Mark both sides of the board. This helps you keep the shape even as you rasp or shave away wood.
Roughing Out The Bow
Now it’s time to remove excess wood and reveal the bow inside the board.
Step-by-step Rough Shaping
- Cut the outline: Use a handsaw to roughly cut outside your lines. Stay 1/8 inch away for safety.
- Shape the limbs: With a rasp or drawknife, thin the limbs evenly. Taper from the grip to each tip.
- Leave the handle thick: Do not thin the center grip area yet.
- Check frequently: Stop often to compare both limbs for symmetry.
Leave Extra Material
Don’t rush to the final dimensions yet. It’s safer to leave the limbs slightly thick. You’ll remove more wood during tillering.
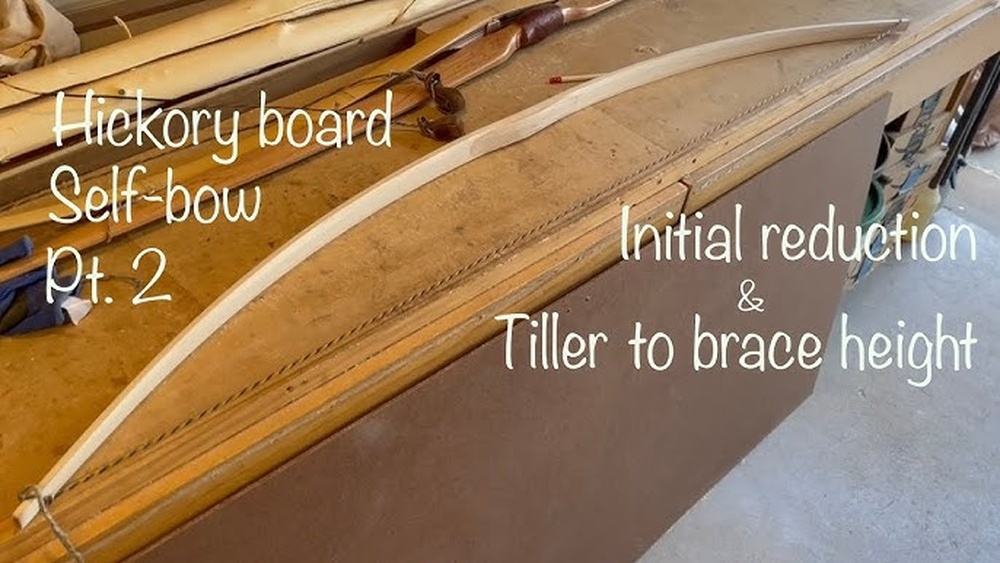
Tillering: Balancing The Limbs
Tillering is the art of making both limbs bend evenly. This step decides how well your bow shoots and how long it survives.
What Is Tillering?
Tillering means removing small amounts of wood so both limbs bend the same amount when drawn. A well-tillered bow feels smooth and accurate. Poor tillering leads to weak spots, stacking (hard draw), or sudden breaks.
Tillering Process
- Cut string notches: Use a round file to make small notches near each tip.
- Attach a long string: Use a tillering string longer than the final bowstring.
- Floor tiller: Press one tip on the floor, bend gently. Watch how the limbs flex.
- Tillering stick: Place the bow on a tillering stick (a notched board or rope and pulley system). Draw to 10 inches, check bend.
- Remove wood: Use a rasp or scraper to thin stiff spots. Work in small amounts.
- Repeat: Draw further each time (12″, 14″, up to 28″). Check the bend at each stage.
Warning: Never draw the bow to full length until both limbs bend evenly and smoothly.
How To Spot Problems
- Flat or stiff areas: These don’t bend enough; remove more wood.
- Hinges: If a spot bends too much, stop removing wood there.
- Twist: If one limb twists, gentle heat and hand-bending can help.
Example: I once rushed tillering and ended with a sharp hinge. The bow shot arrows, but it creaked and finally cracked after 100 shots.
Shaping The Handle And Tips
With tillering finished, refine the handle and tips for comfort and performance.
Handle
Shape the grip to fit your hand, oval or rounded is typical. Avoid making it too thin, which weakens the bow. Sand smooth for comfort.
Tips
Narrow each tip to about 0. 5 inches wide. Round the edges. Deepen the string notches just enough to hold the string securely, but not so deep they weaken the tip.
Pro Tip: A gentle taper at the last 6 inches of each limb reduces hand shock and improves arrow speed.
Stringing The Bow
A good string is vital for performance and safety. There are several ways to make or buy bowstrings.
String Material
- Dacron B-50: Most popular, strong and flexible
- Nylon paracord: Works for beginner bows, but stretches more
How To Make A Simple String
- Cut a length: About 10, 12 inches longer than your bow.
- Tie loops: Use a bowyer’s knot or timber hitch for temporary loops.
- Fit to the bow: Place the larger loop over one tip, the smaller over the other.
- Brace height: When strung, the string should be 6, 7 inches from the grip.
Stringing Method
Use a bow stringer for safety. Never step through the bow, this can twist the limbs.
Warning: Always wear eye protection when stringing or shooting a new bow.
Finishing And Protecting Your Bow
Proper finishing increases the bow’s lifespan and looks.
Sanding
Start with 60 grit to remove marks, then move to 120 and 220 for smoothness. Pay extra attention to the grip and tips.
Sealing
- Tung oil: Easy to apply, natural look
- Boiled linseed oil: Traditional and protective
- Polyurethane: Strong but can be slippery
Apply 2, 3 coats, letting each dry fully.
Optional Backing
For extra insurance, especially with red oak, glue a layer of linen, rawhide, or fiberglass tape to the back (the side facing away from you). This helps prevent splinters.
Pro Tip: Even a thin layer of wood glue and canvas can save a bow from snapping.
Testing And Shooting Your Self Bow
The first shots are exciting, but safety comes first.
Safety Checks
- Inspect for cracks or odd noises
- Make sure the string is secure
- Wear arm and eye protection
Shooting Tips
- Start with light draw weights and short draws
- Use arrows matched to your bow’s draw weight (usually 25, 50 lbs for self bows)
- Stand square to the target and focus on a smooth draw
How To Store
Hang the bow unstrung in a cool, dry place. Avoid leaving it in hot cars or direct sun, which can warp wood.
Realistic Expectations
A well-made self bow from a board can shoot arrows at 120, 160 feet per second. It may not match a modern compound bow, but it is accurate and satisfying.

Credit: www.youtube.com
Common Mistakes And How To Avoid Them
Even experienced bowyers make errors. Here’s what to watch out for:
- Poor wood selection: Don’t rush this step. Boards with hidden knots or curved grain often fail.
- Removing too much wood: It’s easier to take off more later. Go slow, especially during tillering.
- Uneven limbs: Measure and check symmetry often. Small differences grow as you shape.
- Dry firing: Never draw and release the string without an arrow, this can snap your bow.
- Ignoring moisture: Wood absorbs water. Store your bow properly and finish well.
Pro Tip: If your bow feels “spongy” or weak, it’s usually too thin or has a poor grain.
Practical Tips For Success
From experience, these small adjustments make a big difference:
- Humidity matters: If possible, work in a dry, stable environment. Changes in humidity can warp your bow or change its draw weight.
- Patience over tools: It’s better to spend time tillering than to buy expensive gear.
- Document progress: Take notes and photos. This helps you learn from each bow and improve.
- Test early: Start floor tillering as soon as the bow takes shape, not just at the end.
- Back up string: Make a spare string, especially for your first attempts.
Data Comparison: Self Bow Vs. Other Bow Types
To understand how self bows compare to other types, see the data below.
| Bow Type | Average Draw Weight (lbs) | Typical Arrow Speed (fps) | Materials |
|---|---|---|---|
| Self Bow | 25, 50 | 120, 160 | Single wood board |
| Laminated Longbow | 35, 60 | 140, 180 | Wood, fiberglass |
| Compound Bow | 40, 70 | 250, 330 | Alloy, composite |
A self bow has lower speed than a compound, but offers simplicity and historical value.
Maintenance And Longevity
A self bow can last years with proper care.
- Reseal regularly: Apply oil finish every 6, 12 months.
- Check for cracks: Inspect before each use.
- Store unstrung: Keeps wood relaxed.
Pro Tip: If you notice splinters or rough spots, sand lightly and reseal immediately.

Credit: www.youtube.com
When To Seek Expert Help
If your bow creaks, develops deep cracks, or won’t bend evenly, don’t risk injury. Contact a local archery club or experienced bowyer. They can often spot issues that are invisible to beginners.
For more on traditional bow making and safety, see the Wikipedia Bow and Arrow page.
Frequently Asked Questions
What Is The Best Wood For A Beginner’s Self Bow?
For beginners, hickory and red oak are top choices. Hickory is forgiving and resists breaking even if tillering is not perfect. Red oak is affordable and found in most hardware stores, but always check the grain carefully.
How Do I Know The Draw Weight Of My Self Bow?
To measure draw weight, use a simple spring scale. Hook the scale to the string, draw to your anchor point (often 28 inches), and read the weight. If you don’t have a scale, most archery shops can test it for you.