How to Measure a Bow’s Axle-to-Axle Length
Measure a compound bow’s axle-to-axle length from the center of the top axle to the center of the bottom axle with the bow at rest, then compare that reading to the factory ATA spec within about 1/8 inch. Bad readings can make a normal bow look damaged, or hide a real setup or parts problem. This guide shows the correct measuring point, what changes the number, and how to tell a normal difference from an off-spec bow.
Axle-to-axle length basics

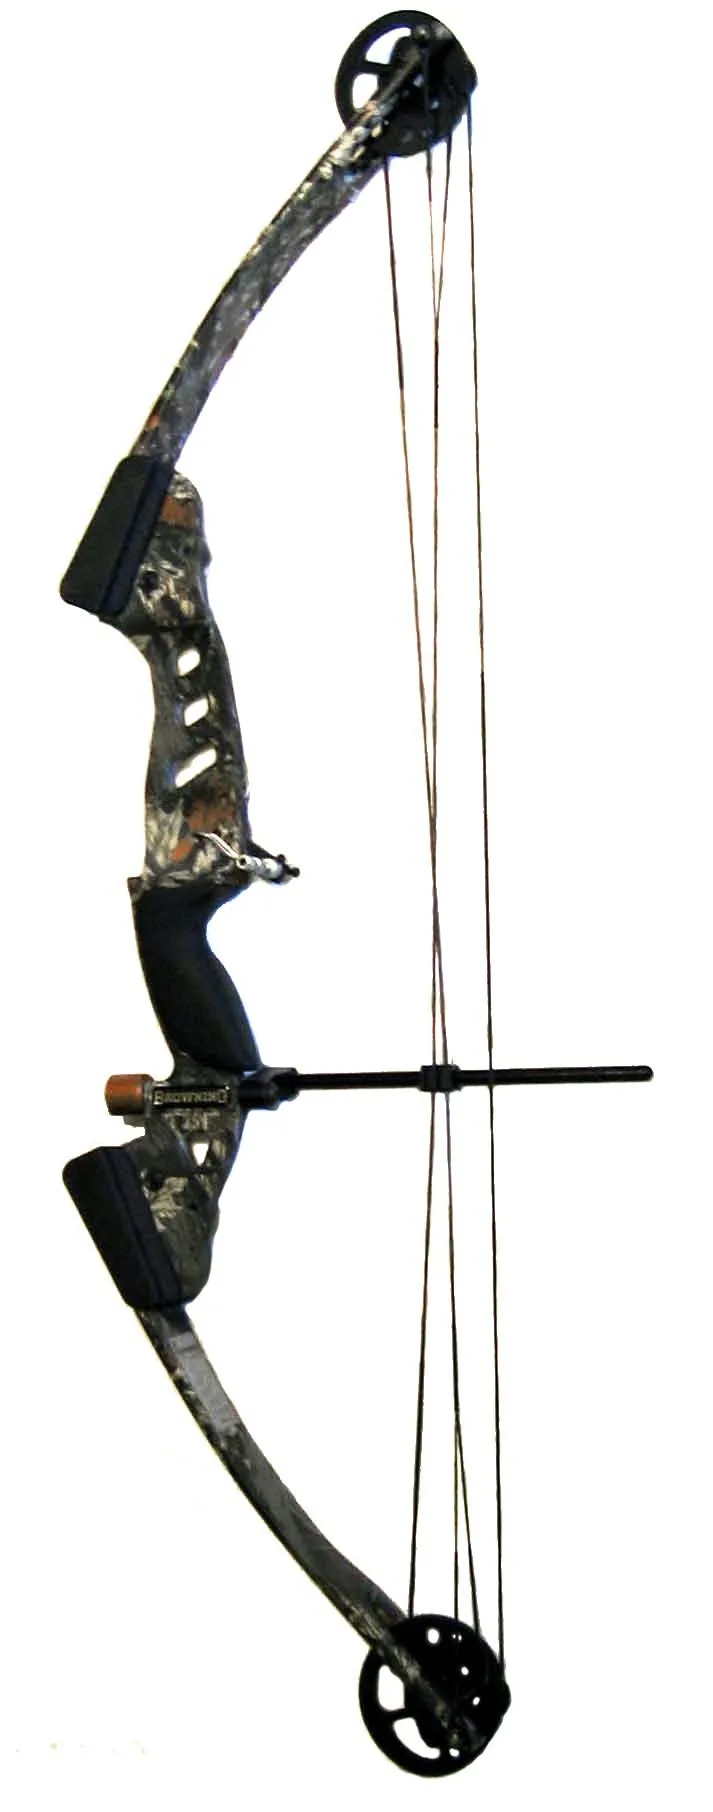
Axle-to-axle length is the straight-line distance between the center points of the two axles on a compound bow. It is typically listed in inches and is one of the standard fit specs manufacturers publish for compound bows.
Do not treat ATA as the same thing as the bow’s outside width. Outer cams, caps, washers, and limb hardware can make the bow look longer than it measures. The useful number is always the axle-center measurement, not the outer edge of any part.
What ATA measures on a compound bow
ATA measures the distance between the top axle center and the bottom axle center, straight across the bow. That straight line is what matters. Measuring along the limb, around a cam, or from outside hardware will give the wrong result.
Why manufacturers list ATA in inches
ATA is a fast fit reference. It lets you compare stability, maneuverability, and string angle across bows without inspecting every part. For many shooters, it is one of the first numbers to check beside draw length and brace height.
How ATA differs from overall bow size
A bow can look bulky yet still have a moderate ATA, or look compact while measuring longer than expected because of cam shape and limb hardware. Overall visual size is useful for handling, but ATA is the spec that tells you the axle-center span.
Why ATA matters on a compound bow
ATA affects stability, maneuverability, and string angle at full draw. Those changes show up in how steady the bow feels, how easily it fits in tight spaces, and how the peep sight lines up with the eye.
Longer ATA bows usually feel steadier at full draw because the string angle tends to be less sharp. Shorter ATA bows move more easily in treestands, ground blinds, and tight spots. The tradeoff also changes how the string sits against the archer’s face and how the peep sight settles.
How ATA changes string angle and peep sight position
A sharper string angle pushes the peep sight further from the eye. The further the peep sits from the eye, the larger the peep aperture may need to be. That is why short bows can feel cramped to some archers, especially at longer draw lengths.
How ATA fits with brace height and forgiveness
ATA should be read with brace height, because the two specs shape bow feel together. Shorter brace height usually feels less forgiving, while longer ATA often gives a steadier hold and a more forgiving string angle. Neither number acts alone.
Compound bow fit starts with draw length and manageable draw weight. ATA, brace height, let-off, and intended use affect how a compound bow feels, but draw length remains a major part of the decision.
A 30-inch ATA bow may feel sharper to an archer with a 31-inch draw than to one with a shorter draw. The string angle will feel sharper than it would to a 27-inch draw archer on the same bow, so the peep may sit farther from the eye and feel harder to center cleanly.
What you need to measure ATA
A tape measure is the main tool. You also need a clear view of both axle centers, because the measurement only works when the tape can run straight from one center point to the other.
A helper can make the job easier on bows with tight axle access, thick cam guards, or hardware that hides the center. The goal is not to guess at the center; it is to expose enough of the axle to measure from the true center point.
- A straight tape measure that reads inches clearly
- A bow at rest, with no need to draw it
- A clear look at the top and bottom axle centers
- A helper if the axle center is hard to reach
How do you measure a bow’s ATA?
Measure straight from the top axle center to the bottom axle center with the bow at rest. The tape should run in a direct line, not around the bow and not along a limb. Read the result in inches, then compare it to the published ATA spec.
Find the center of the top axle
Look for the point where the top axle passes through the cam or wheel mounting point. If axle caps, limb bolts, or cam shape block the view, work from the visible ends inward and identify the midpoint, not the outside edge of the hardware.
Find the center of the bottom axle
Use the same midpoint method on the bottom axle. The measurement only works if both ends reference the axle centers. If one side is hard to see, reposition the bow or use a helper so the tape can line up with the true center.
Run the tape straight between axle centers
Hold the tape so it bridges the two centers in a straight line. Do not follow the curve of the limbs. Do not touch outer cam edges as a reference. If the tape cannot sit cleanly on both centers, reset the bow position and try again.
Read the measurement in inches
Read the number where the tape lines up with the opposite axle center. Then compare that number to the factory ATA spec. A small difference is often normal; the important step is deciding whether the gap is within a tolerance you accept.
- Set the bow at rest.
- Locate the top axle center.
- Locate the bottom axle center.
- Run the tape straight between the two centers.
- Read the ATA in inches.
- Compare the reading to the published spec.
Axle-to-axle checklist
This checklist helps verify a used bow or a bow with changed parts. Record the published spec first, then note whether the measured number is close enough for your tolerance. That keeps a small difference from being mistaken for a defect.
| Check item | What to record | Why it matters |
|---|---|---|
| Bow model | Exact model name and year if known | ATA specs vary by model |
| Published ATA | Factory ATA in inches | Sets the comparison point |
| Measured ATA | Your axle-center reading in inches | Shows the actual bow length |
| Measurement points used | Top axle center to bottom axle center | Confirms the correct method |
| String and cable condition | New, worn, stretched, or unknown | Changed strings or cables can change setup feel |
| Axle-center access issue | Clear, partially blocked, or hidden by hardware | Bad access can lead to a wrong reading |
| Tolerance result | Within or outside your chosen limit | Decides whether the difference matters |
Tolerance log table
| Bow model | Published ATA | Measured ATA | Measurement points used | String/cable condition | Axle-center access issue | Within tolerance? |
|---|---|---|---|---|---|---|
| Example A | 30 in. | 29 7/8 in. | Top axle center to bottom axle center | New strings, unknown cables | Bottom axle partly hidden by cam guard | Yes, within 1/8 in. |
| Example B | 34 in. | 33 3/4 in. | Top axle center to bottom axle center | Used strings, moderate wear | Top axle center hard to view past limb bolt hardware | Yes, within 1/4 in. |
| Example C | 31 in. | 30 1/2 in. | Measured from outer cam edge by mistake first | Unknown | Center hidden at both axles | No, remeasure needed |
A common first-timer mistake is measuring from the outside of the cam or from a visible edge of the axle cap. That can create a false short or long reading, especially when the axle center is partly blocked. The fix is simple: reset the tape and measure from the true center points.
What if the number does not match the spec?
If the reading does not match the factory ATA, start by checking the measurement method before assuming the bow is wrong. Swapped cams, altered modules, stretched strings, or cables can also change the way the bow sits at rest. A small mismatch is not automatically a problem.
Check for swapped cams or changed modules
Used bows can have parts changed after purchase. If the cams or modules do not match the model’s original setup, the measured ATA may shift from the published number. Compare the parts on the bow with the model’s known configuration before drawing any conclusion.
Look for stretched strings or cables
Worn strings and cables can change bow timing and resting position. That may not rewrite the factory ATA spec, but it can affect how the bow settles and how the measurement seems when the bow is inspected. If the set looks old or uneven, note it in the log.
Confirm the measurement method first
Recheck that the tape ran straight from axle center to axle center. Confirm that neither measurement point used outer hardware, limb edges, or cam faces. If the number changes after a careful repeat, the first reading likely came from a bad reference point.
Decide whether the difference is acceptable
A practical tolerance keeps minor variation from becoming a false alarm. For many owners, about 1/8 inch is a reasonable tolerance when checking against the factory spec. If the gap is larger, or if the bow feels wrong at full draw, look deeper into parts and setup.
How ATA affects fit and setup
Shorter ATA bows are easier to maneuver in treestands, ground blinds, and tight spots. Longer ATA bows offer a more forgiving string angle and steadier hold at full draw. That tradeoff matters more once draw length and peep sight position enter the picture.
Short ATA bows and peep sight distance
Short bows sharpen the string angle, so the peep sight often sits farther from the eye. That can make the peep aperture feel small or hard to center. A larger peep opening may help when the bow is short and the draw length is long.
Long ATA bows and anchor feel
Longer ATA bows usually give more room between the face and the string. That can make anchor points feel calmer and the peep easier to line up. The bow may also hold steadier at full draw, which is why many target shooters prefer longer ATA.
How draw length changes the string angle
Longer draw length makes the string angle sharper on any bow. A 27-inch draw archer on a 30-inch ATA bow has a wider string angle than a 31-inch draw archer. That difference is why the same bow can feel fine to one shooter and cramped to another.
Suppose a hunter buys a used 31-inch ATA bow that measures 30 7/8 inches. If the log shows the tape was centered, the strings are in decent shape, and the tolerance is 1/8 inch, the result is close enough to call normal. If the bow also has swapped cams, the spec check deserves a closer look.
Frequently asked questions
How do I measure bow axle-to-axle length?
Measure straight from the center of the top axle to the center of the bottom axle with the bow at rest. Use a tape measure, not a curved path around the bow. Then compare the reading to the published ATA spec and judge it against your tolerance.
How do I measure compound bow axle-to-axle length?
The method is the same for a compound bow: top axle center to bottom axle center, in a straight line. The main challenge is seeing the center points clearly. If hardware blocks the view, reposition the bow or use a helper before trusting the number.
How do I measure axle length on a bow?
For a compound bow, “axle length” usually means ATA, or axle-to-axle length. The correct reading comes from the axle centers, not the limbs, cams, or outer edges of the bow. Read the number in inches and compare it to the manufacturer spec.
What does axle-to-axle length mean on a compound bow?
It is the distance between the center points of the two axles. That number helps explain how the bow will handle, how it may feel at full draw, and how sharp the string angle will be. It is one of the key fit specs for compound bows.
Do I measure axle-to-axle from the inside or center of the axles?
Measure from the center of the axles. The inside edge or outside edge of the hardware is not the reference point. If the axle center is hidden by caps, cams, or limb hardware, work carefully until you can identify the true center before reading the tape.
Why does axle-to-axle length matter for accuracy?
ATA affects stability, maneuverability, and string angle at full draw. A steadier hold can help with a calmer shot process, while a sharper string angle can make peep alignment more demanding. It is not the only factor, but it changes how the bow behaves for the shooter.
How does axle-to-axle length affect peep sight and anchor feel?
Shorter ATA makes the string angle sharper, which pushes the peep sight further from the eye. That can change how the anchor feels and may call for a larger peep aperture. Longer ATA usually softens that feel and can make the peep easier to center.
How do I verify a used bow’s axle-to-axle spec?
Check the bow’s model, note the published ATA, then measure axle-center to axle-center with the bow at rest. Record string and cable condition, any axle access issue, and the measured number. If the result is within your tolerance, it is usually close enough to call normal.
What axle-to-axle length is best for hunting versus target shooting?
For hunting, shorter ATA is often preferred because it is easier to move in treestands, ground blinds, and tight spots. For target use, longer ATA is often favored because it offers a steadier hold and a more forgiving string angle. Brace height and draw length still matter.